Step-by-Step Instructions
Follow these steps to ensure your bars come out perfectly gooey every time.
1. Prep the Foundation
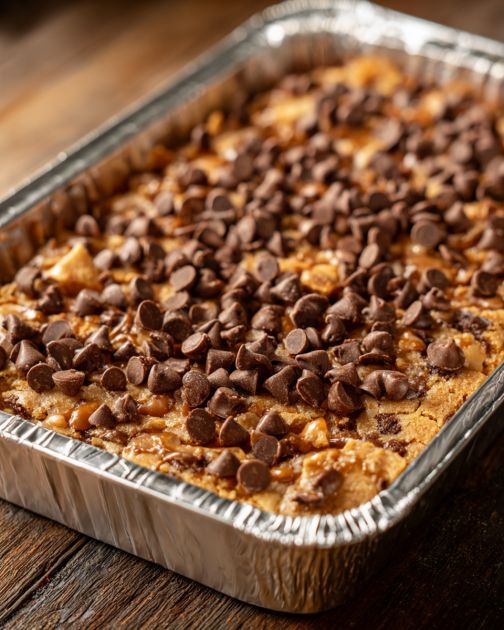
Preheat your oven to 350°F. Grease a 9×13 inch baking pan (or a large foil tray like the one in the photo). Take about two-thirds of your cookie dough and press it firmly into the bottom of the pan to create an even layer.
2. The Caramel Core
Bake the bottom layer for about 8–10 minutes just to let it set. Remove it from the oven and pour your caramel sauce over the center, leaving about a half-inch border around the edges so the caramel doesn't burn against the side of the pan.
3. The Final Layer
Crumble the remaining cookie dough over the top of the caramel. It doesn't have to be perfect; the gaps allow the caramel to bubble through. Finally, the star of the show: heavily sprinkle your chocolate chips across the entire surface.
4. Bake to Perfection
Return the pan to the oven for another 15–20 minutes. You are looking for the edges to be golden brown and the center to have a slight, stable jiggle.
Pro Tip: Let these cool completely before cutting! If you cut them while hot, the caramel will run. If you wait, you get those perfect, clean-cut squares.
Variations and Pro Tips for Success
While the 3-ingredient version is a classic, you can easily tweak this to make it your own signature dish:
-
The Salty Finish: Sprinkle a pinch of flaky sea salt over the chocolate chips immediately after taking them out of the oven to elevate the caramel flavor.
-
Nutty Crunch: Add a half-cup of crushed pecans or walnuts to the top layer for a “Turtle” cookie vibe.
-
Storage: These stay fresh in an airtight container for up to 5 days, making them the perfect make-ahead treat for Christmas week.