Step-by-Step Instructions
1. Prepare Your Pan Start by lining an 8×8-inch square baking pan with aluminum foil or parchment paper. Make sure to leave a little overhang on the sides; this acts as a “handle” so you can easily lift the entire block of fudge out once it has set.
2. Melt the Chocolate In a large microwave-safe bowl, add your white chocolate chips. Microwave them in 30-second intervals, stirring thoroughly between each session. It is crucial to go slowly so the chocolate doesn’t seize or burn. Stop once the chips are almost entirely melted—the residual heat will finish the job as you stir.
3. Combine with Frosting Remove the lid and foil seal from your frosting tub. Microwave the frosting for about 30 seconds just to soften it up and make it pourable. Pour the entire tub into the bowl with the melted white chocolate.
4. Stir Until Smooth Fold the two ingredients together using a spatula. At first, it might look a little marbled, but keep stirring until the color is uniform and the mixture is glossy and smooth.
5. Set the Fudge Pour the mixture into your prepared pan. Use your spatula to smooth out the top into an even layer. Let it sit on the counter for a few minutes to cool slightly, then transfer it to the refrigerator.
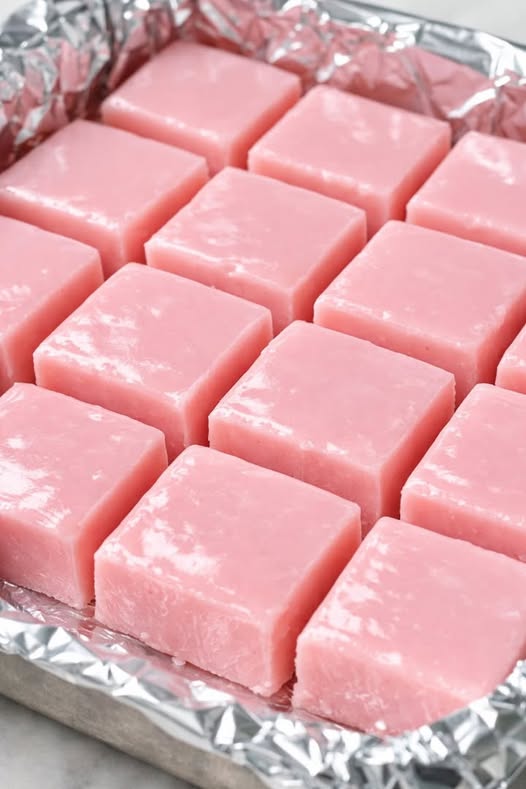
6. Chill and Slice Allow the fudge to chill for at least 2 to 3 hours, or until it feels completely firm to the touch. Once set, lift it out of the pan using the foil handles. Use a sharp, warm knife to slice it into uniform bite-sized squares.
Tips for the Perfect Batch
-
The Knife Trick: To get those clean, sharp edges seen in the photo, dip your knife in hot water and wipe it dry between every single cut. The heat will glide through the fudge like butter.
-
High-Quality Chocolate: Since there are only two ingredients, the quality of your white chocolate matters. Real cocoa butter chips will yield a much creamier result than “candy melts.”
-
Storage: This fudge stays fresh in an airtight container in the refrigerator for up to two weeks. It also freezes beautifully if you want to prep it well in advance of a big gathering.
Creative Variations to Try
Once you’ve mastered the base recipe, you can easily customize this fudge for different occasions:
-
The Crunch Factor: Fold in a half-cup of chopped pecans or walnuts for a bit of texture.
-
Chocolate Swirl: Melt a small amount of dark chocolate and swirl it through the top before the fudge sets for a “chocolate-covered strawberry” vibe.
-
Holiday Toppings: Sprinkle some festive sprinkles or a pinch of sea salt on top while the mixture is still wet in the pan.
-
The “Fancy” Finish: If you want a more rustic look, top the fudge with small pieces of freeze-dried strawberries. It adds a nice tartness that balances the sweetness of the frosting.
Whether you are bringing this to a holiday potluck or just want a quick sweet treat to keep in the fridge, this 2-ingredient strawberry fudge is proof that you don't need a long list of ingredients to create something spectacular. Give it a try, and watch how quickly it disappears!